Sign Up
School Account Sign Up
Lesson ID: 11828
Turn your everyday photos into eye-catching art with easy tips that make your shots pop!


Say Cheese! Turn Snaps into Stunning Shots
That kind of magic doesn’t come from expensive cameras or fancy filters. It comes from you—the person holding the phone. With a few easy photography tips, you can turn ordinary pictures into powerful works of art.
Whether you dream of being a professional photographer or just want to take better selfies, this lesson will teach you how to see like an artist, shoot like a pro, and share your photos in ways that wow.
What Makes a Photo More Than a Snapshot?
Anyone can point a phone at something and tap the screen. But great photographers stop and ask these questions.
What is my subject?
What story am I trying to tell?
How can I frame this to make it shine?
Photography is part science, part art—and 100% creativity. Let’s break down the five most important photo composition guidelines that can turn your shots from “meh” to magnificent.
The 5 Guidelines That Make a Photo Pop
Rule of Thirds
Imagine your screen divided into a 3x3 grid—like a tic-tac-toe board. Placing your subject near one of the four intersections (where the lines cross) creates a balanced and interesting composition. It feels more natural to the viewer than putting everything smack in the middle.

Try this: Instead of centering your friend in the middle of the shot, move slightly so they’re off to the side.
Fill the Frame
Zoom in with your feet, not your fingers!
Get close to your subject so it fills up most of the photo. This removes distracting backgrounds and draws the viewer’s eyes right where you want them.
Try this: Snap a picture of a flower, filling the entire frame with its petals and colors. No background distractions!

Watch the Background
Take a second to scan the background before snapping the shot. A clean, simple background makes your subject stand out.

Pro tip: Move your camera just a little to change the background completely without moving the subject at all.
Light It Right
Lighting can make or break your photo.
Avoid harsh midday sun—it creates shadows and squinting. Early morning or late afternoon light (called “golden hour”) is soft and glowy.
Indoors? Try facing a window for natural light.

Try this: Take the same photo at different times of day and compare how the lighting changes the mood.
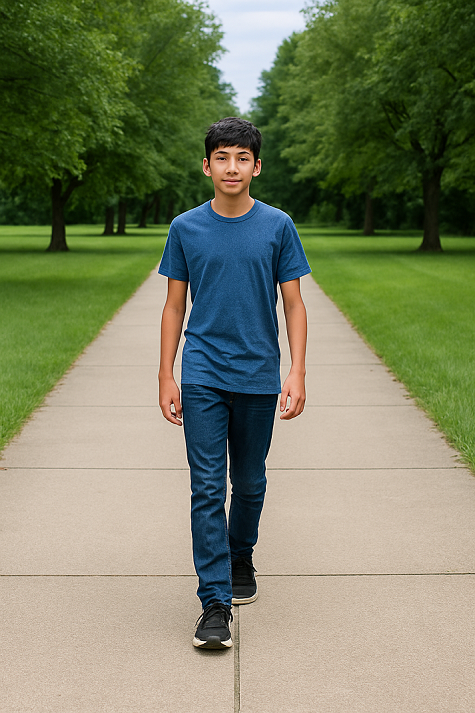
Use Leading Lines
Look for sidewalks, fences, rivers, or even rows of lockers that lead the viewer’s eyes toward your subject. These “leading lines” guide people to what matters in your photo.
Try this: Take a photo of someone walking down a path, with the lines of the path leading straight to them.
Cell Phone = Photo Power
Don’t have a fancy DSLR? No problem! Your phone is packed with the same tools that professionals use.
Gridlines help you apply the rule of thirds.
Focus and exposure can be tapped and adjusted before you shoot.
Editing tools let you crop, brighten, or filter your shot after taking it.
Some of the world’s best photographers take stunning pictures with just a phone. All you need is a good eye and a few smart techniques.

Getting Photos Off Your Phone
After taking some incredible shots, you’ll want to save or share them. Here’s how.
Use a USB cable to plug your phone into a computer. On iPhones, this shows a DCIM folder where your pictures live. For Android, check under Internal Storage.
Send wirelessly using Bluetooth, AirDrop (iPhones), or apps like Dropbox or Google Photos.
Email yourself the photo or use messaging apps, but be aware this can lower image quality.
Once your photos are on a computer, you can save them, print them, or turn them into a slideshow or digital gallery.

Practice Time!
Now that you know how to capture an amazing photo, it’s time to put those skills into action. Head to the Got It? section!

Supplies


